LasercutterS
IntroductiON
an introduction to designing for and working with lasercutters

Lasercutters form the backbone of any fast prototyping lab. Our CO2 lasercutters are capable of cutting to engrave and cut a variety of wood, paper, cardboard. Cutting metal or glass isn't possible, but can be engraved.
Due
to the process of sublimation, a lasercutter uses extremly focused light to burn through materials. Because of this, you can not use any CFC holding materials, as it would severly damage the machines
and your health.
While we are open for experimentation it is an absolute must to prove that the materials you bring are CFC-free.
When using this technique correctly, lasercutting is efficeint, pricise and fast without having a lot of post processing work. Keep in mind that there is a real fire hazard involved when you don't take the safety precautions serious or mis-use the lasercutter. This can happen due to bad focus or design mistakes. Because of this, a lasercutter may NEVER be left unsupervised. If you do, your lasercut certification will be revoked for the remainder of the semester after which you will need to complete the tutorial again.
Each lasercutter at the MMLab has its own power and will reacts different to materials. The Trotecs have a lasertube of 80 and 90 Watts, and are excelent for fne engraving. The BRM has a 150W lasertube, which is mainly targetted at cutting instead of engraving. The 80W Trotec is also equiped with a camera allowing to read and trace registration marks.
In the MMLab you'll find the most common maquette and prototyping materials. For each of these materials, optimized settings are available. Materials we have in stock you buy in the MMLab. For materials that are less common and we don't stock, there are strickt regulations:
- The material hast to be 100% CFC free (chlorofluorocarbon). A technical description of the material is necessary!
- the maximum thickness depends on the machine and the type of material.
- Contact the MMLab before buying exotic materials, so you won't be disappointed with the result.
- Lasercutting new (excentric) materials requires a series of extensive testing to optimze the results. Plan this well in advnace together with the lab manager. This is done prferably on Fridays.
- Optimizing cutting settings for new materials is done using the experimental/diagnostic setting only. At the end of the tests, a new setting is made for the material together with the lab manager.
- If the lab manager doesn't authorize the use of a certain material, you don't use it. This is not open for discussion.
There is a list of materials that, in theory, is lasercuttable. This list is open for change and can be adjusted without prior notice. When in doubt, contact the lab manager.
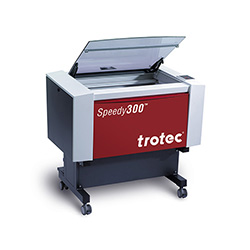
Trotec Speedy 300
80W/90W Laser engrave machine 726x432mm
De Trotec Speedy 300 has a working area of maximum 726x432 mm, it is adviced to keep your designs at a maximum of 700x400mm. Most of the materials at the lab are this size. Please take not of the
general safety precautions with regard to operating this machine!
The software needed to operate this machine is jobControl, which operates as a virtual printer driver. Therefor, you'll need to make sure your plans readable by Adobe Illustrator, which functions as an intermediary application
to send plans to jobControl. As a rule of thumb your designs are made with an artboard that is exactly the same as the working area of the laser (700 x 400 mm). Linewidth needs to be exactly 0,001mm , colors to
use are:
| Raster engraving: | black rgb(0,0,0) #000000 |
| Line engraving | red rgb(255,0,0) #FF0000 |
| Inner cut: | blue rgb(0,0,255) #0000FF |
| Outer cut: | green rgb(0,255,0) #00FF00 |
Tutorial files Trotec
| Tutorial Trotec NL: | TrotecTutorialNederlands.pdf | TrotecTutorialEnglish.pdf |
| Illustrator template Trotec: | Speedy300.ai | |
| Illustrator template TrackingTrotec: | CameraTracking.ai |
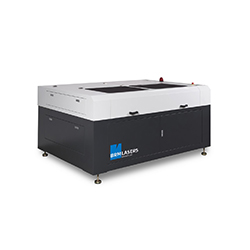
BRM 100160
150W Lasercutter 1600x1000mm
The BRM has a maximum working area of 1600x1000mm. Because the BRM does not have a fixed zero-point, it is adviced to include an larger margin (of about 10mm). Pay attention to adjust your designs to the sizes of the material you
use. Please take not of the general safety precautions with regard to operating this machine!
The software for the BRM lasercutter is the stand-alone programma LaserWork. This application reads dxf or Adobe Illustrator files saved as the 2008 version. Make your plans according to the Trotec guidelines and use Adobe Illustrator
to convert to DXF.
| Raster engraving: | black rgb(0,0,0) #000000 |
| Line engraving | red rgb(255,0,0) #FF0000 |
| Inner cut: | blue rgb(0,0,255) #0000FF |
| Outer cut: | green rgb(0,255,0) #00FF00 |
Tutorial files BRM
| Tutorial BRM: | BRMTutorialNederlands.pdf | BRMTutorialEnglish.pdf |